This guide contains affiliate links. ContainerCompass earns a small commission on qualifying purchases at no extra cost to you.
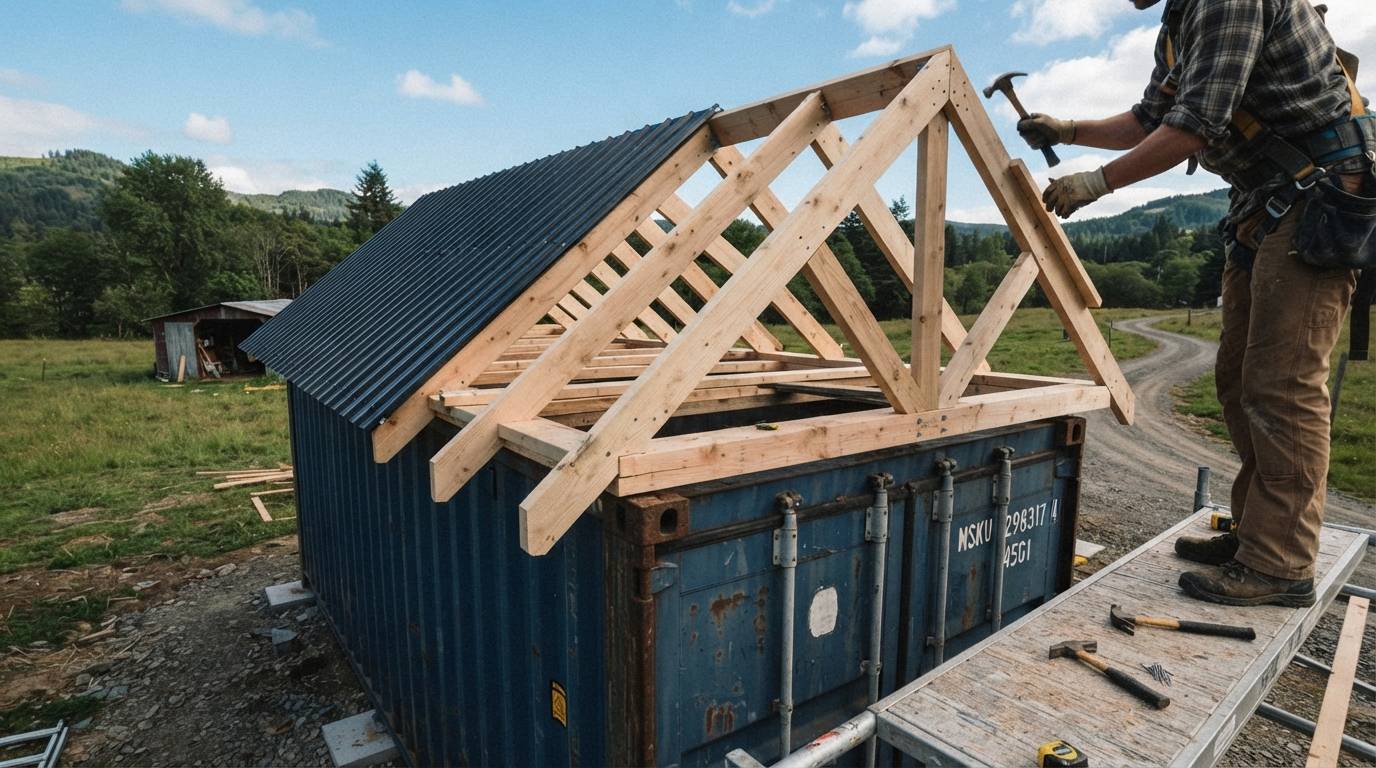
Adding a gable roof is one of the most impactful single upgrades a container owner can make. A flat container roof was designed to survive an ocean crossing — not years of stationary service. This case study documents a community-minded build in which a builder constructs an A-frame gable roof on a neighbor's 40ft shipping container, covering the structural engineering, attachment methods, framing sequence, and exact material costs.
DIY materials cost
$1,481–$3,165
Single 40ft container, 4:12 pitch
Installed total
$3,000–$7,500
Materials + professional labor
DIY build time
1–2 weeks
Experienced crew of 2–3
Skill level
Intermediate DIY
Framing experience required
Best roof material
Corrugated metal
40–70 yr life; lightest; fastest
Critical rule
Attach to top rails
Never the corrugated sheeting
In this case study
Why Add a Gable Roof — The Flat Roof Problems
A shipping container's flat corrugated steel roof was designed to be watertight enough to survive an ocean crossing. It was not optimized for years of stationary service as a building. Three chronic problems affect flat container roofs:
- Water pooling: The corrugated roof troughs accumulate standing water that never fully drains, accelerating rust and seam failure over time
- Radiant heat gain: A flat dark steel surface in direct sun becomes a massive radiant heater — interior temperatures can reach 140°F+ without mitigation
- Snow load accumulation: In climates with significant snowfall, snow accumulates on a flat container roof rather than shedding, building to 50+ psf of structural loading that the corrugated sheeting (~20 psf capacity) cannot safely handle
| Problem | Flat container roof | Gable (A-frame) roof added |
|---|---|---|
| Rain drainage | Pools at low spots; seam corrosion over time | Immediate runoff on both slopes; overhangs direct water away from walls |
| Snow management | Accumulates; sheeting rated ~20 psf; loads can exceed this in northern US | Snow sheds naturally; pitch of 6:12+ self-clears in most conditions |
| Summer heat | Flat steel roof absorbs sun; conducts heat aggressively to interior | Air gap creates insulating buffer; measurably lower interior temps |
| Attic space | None — container ceiling is the roof | Attic triangle above container — storage, insulation, mechanical systems |
| Aesthetic | Industrial; may conflict with residential/neighborhood requirements | Residential or agricultural appearance; sympathetic to surrounding context |
| Wall protection | No eave overhang — water runs straight down sides | Overhanging eaves protect walls and door areas; extends container exterior life |
Structural Attachment to the Container
Framing Components Explained
| Component | Function | Typical spec | Container-specific note |
|---|---|---|---|
| Bottom plate / ledger | Horizontal base from which roof framing springs; attaches to container top rail | PT 2×6 or 2×8; or steel HSS | Must attach to top rail — NOT corrugated sheeting |
| Ridge board / ridge beam | Central horizontal member at peak where opposing rafters meet | 2×10 or 2×12 lumber; LVL for spans over 20ft | For container spans (8ft interior width), 2×10 ridge board is typically adequate |
| Rafters (stick-built) | Sloping members spanning from ridge to bottom plate | 2×6 at 16" o.c. typical for 8ft span; 2×8 for longer overhangs or heavy snow | Container interior width ~7'6"–7'8" determines minimum rafter span |
| Pre-fabricated trusses | Shop-built triangulated frames; faster than stick rafters | Wood gable trusses to match container span | Most cost-effective for longer spans or limited framing experience; specify span at order |
| Purlins | Horizontal members spanning between rafters; support metal roofing panels | 2×4 or 2×6 at 24"–48" spacing per roofing manufacturer | Metal roofing panels require specific purlin spacing — confirm at panel purchase |
| Overhangs (eaves) | Extension of rafters beyond container wall; protects sides and door areas | Typically 18"–36" overhang at eave | 18"+ overhang important for protecting container walls and softening industrial profile |
| Soffit / Vents | Closes underside of eave; provides critical ventilation inlet for roof cavity | 1×6 cedar with 1" mesh-screened air gap; or perforated aluminum soffit | CRITICAL: 1" minimum air gap with insect screen; without ventilation, heat and moisture cause condensation and framing damage |
Pitch Selection & Roofing Materials
Choosing the Right Pitch
| Pitch | Attic ht at center (8ft span) | Snow shedding | Best for |
|---|---|---|---|
| 3:12 | ~24" at ridge | Minimal | Low-snow climates; modern aesthetic |
| 4:12 | ~32" at ridge | Moderate | Most popular for container barn conversions; moderate climates |
| 6:12 | ~48" at ridge | Good | Mixed climates; good attic storage; recommended minimum for snow-prone areas |
| 8:12 | ~64" at ridge | Excellent | Heavy snow climates (Northeast, Mountain West) |
| 12:12 (45° A-frame) | ~96" at ridge | Maximum | Mountain retreats; very heavy snow; architectural statement |
Roofing Materials
| Material | Cost (material/sq ft) | Life expectancy | Container suitability |
|---|---|---|---|
| Corrugated metal panels (Galvalume) | $0.80–$2.00 | 40–70 years | Best — lightweight; durable; fast to install on purlins; complements container aesthetic |
| Standing seam metal | $2.50–$5.00 | 50–70+ years | Excellent — no exposed fasteners; more complex installation; premium builds |
| Asphalt shingles (architectural) | $1.50–$4.50 installed | 20–30 years | Good — requires solid decking (OSB or plywood) rather than open purlins |
| Polycarbonate panels (translucent) | $1.50–$3.00 | 10–20 years | Good for covered areas needing natural light; less durable for primary use |
Ventilation — The Most Overlooked Requirement
Why ventilation is critical
A gable roof creates a closed attic triangle between the roof surface and the container ceiling. Without proper ventilation, this space accumulates heat in summer and moisture in winter, creating condensation on the container steel and mold in the wood framing.
- Soffit inlet vents: 1" minimum mesh-screened air gap at eaves — allows cool outside air to enter the attic cavity at low points
- Ridge vent or gable end vents: Hot air exits at the highest point — gable end vents (one at each end triangle) work well for single-container applications
- Minimum ventilation ratio: 1 sq ft of net free ventilation area per 150 sq ft of attic floor area (per building codes)
- For a 40ft container attic (~320 sq ft): approximately 2.1 sq ft of net free vent area — achievable with standard gable vents at each end plus continuous soffit inlet gap
Build Sequence — Step by Step
Determine pitch, rafter length, ridge height, and overhang dimensions. Sketch a cross-section with all measurements before purchasing materials. Calculate exact rafter length using: (half container width + overhang) ÷ cos(pitch angle).
Install pressure-treated bottom plate along both top side rails using container clamps, through-bolts, or welded angle brackets. Must be level — check with a long level or string line across both sides before proceeding.
A temporary post from the container roof surface to the ridge height while trusses or rafters are being set. Remove after framing is rigid and self-supporting.
If using prefab trusses, set at designed spacing and nail to ledger with hurricane ties. If stick-framing, set ridge board at correct height and install rafter pairs from each end toward center. Check plumb and spacing as you go.
Lookout blocks or bird's mouth cuts ensure proper bearing at the ledger; blocks between rafters close the rafter bay at the eave and provide the soffit nailer.
Frame the triangular gable above each container end with 2×4 studs at 16" o.c. These provide a mounting surface for gable vents and close the open end of the attic.
Space per metal panel manufacturer specification, typically 24"–48" on center; attach to each rafter/truss with structural screws. Confirm purlin spacing matches your chosen panel before installation.
Start at lower edge (eave) and work up the slope; overlap each panel per manufacturer specification (typically 1.5 ribs minimum); use EPDM-washer screws at every purlin crossing. Do not over-drive screws — EPDM washer should compress slightly, not deform.
Metal ridge cap flashing covers the peak; overlap onto both sides minimum 3"–4"; seal with butyl tape or roofing sealant under each section. Ridge cap is the highest-leak-risk point — don't rush it.
Nail fascia board to rafter tails; install soffit board with 1" air gap covered by insect screen at inner edge. This gap is your soffit ventilation intake — don't block it.
Cut opening in gable end framing; install louvered aluminum vent with insect screen; one per gable end. Size to meet minimum ventilation ratio (see Ventilation section above).
K-style or half-round aluminum gutters along fascia; downspouts direct runoff away from container base. Eave overhangs protect the container walls; gutters protect the foundation area. Budget $150–$400 in materials for a 40ft container.
Full Materials List & Costs — 40ft Container, 4:12 Pitch, 18" Overhang
| Material | Quantity | Unit cost (approx. 2026) | Line total |
|---|---|---|---|
| PT 2×6 bottom plate (ledger) | 2 × 40ft = 80 linear ft | $0.80–$1.20/LF | $64–$96 |
| 2×8 ridge board | 1 piece 40ft (or spliced) | $1.50–$2.50/LF | $60–$100 |
| 2×6 rafters (16" o.c., 4:12 pitch) | ~32 rafters × ~7ft = 224 LF | $0.60–$1.00/LF | $134–$224 |
| Hurricane ties (rafter to ledger) | 64 pieces | $0.60–$1.20 each | $38–$77 |
| 2×4 gable end studs | ~24 LF per end × 2 ends | $0.40–$0.60/LF | $19–$29 |
| 2×4 purlins at 24" o.c. | ~21 purlins × 10ft avg = 210 LF | $0.40–$0.60/LF | $84–$126 |
| Corrugated metal roofing panels | ~480 sq ft (includes overhang) | $0.80–$1.80/sq ft | $384–$864 |
| EPDM-washer roofing screws | 1 box (250 count) | $25–$45/box | $25–$45 |
| Metal ridge cap | 42 LF (40ft + overlaps) | $3–$6/LF | $126–$252 |
| 1×8 fascia board (cedar or PT) | ~90 LF | $1.50–$3.00/LF | $135–$270 |
| Soffit board + insect screen | ~90 LF | $0.80–$1.80/LF | $72–$162 |
| Aluminum gable vents (louvered) | 2 pieces | $25–$60 each | $50–$120 |
| Container attachment hardware | Per method chosen | — | $200–$600 |
| Misc. fasteners, caulk, flashing tape | Lump sum | — | $100–$200 |
| TOTAL MATERIALS ESTIMATE | Single 40ft container, 4:12 gable, 18" overhang | $1,481–$3,165 | |
Labor cost context
The build in the source video is a neighbor-helping-neighbor project — labor is reciprocal time and expertise rather than money. A professional framing crew for a single container gable roof typically runs $1,500–$4,000 in labor depending on region, pitch, and complexity. Total installed cost (materials + professional labor): approximately $3,000–$7,500 for a single 40ft container gable roof. A DIY shed roof (single slope) can be built in a few days versus 1–2 weeks for a gabled roof, at roughly 30–50% lower cost.
Before & After: The Impact of an A-Frame Roof
Recommended Products

Structural connectors
Simpson Strong-Tie H2.5A Hurricane Rafter Tie (100-pack)
The industry standard rafter-to-ledger connector for gable roof framing on a container. Required at every rafter for proper load transfer under wind uplift — one per rafter, both sides. A 40ft container at 16" o.c. needs ~64 ties; the 100-pack covers a full build with spares. 18-gauge galvanized steel. 4.7★ from 796 reviews.
$56.45 for 100-pack (~$0.56 each)
View on Amazon →
Roofing panels
Brakki Black Corrugated Metal Roofing Panels (20-pack)
20-piece set of black galvanized steel corrugated panels, each 42.52"×17.72" — covers approximately 104 sq ft, right-sized for a single 40ft container gable roof with overhang. Screws included. Install on purlins at manufacturer-specified spacing; use EPDM-washer screws at every purlin crossing. 4.2★ from 41 reviews.
$145.99 for 20-pack
View on Amazon →
Fasteners
LIONMAX Metal Roofing Screws with EPDM Washer (300-pack, #10×1")
Hex-head self-tapping screws with rubber EPDM washers — required for attaching corrugated metal panels to wood purlins. The EPDM washer compresses to form a watertight seal at each fastener. Install at every purlin crossing, one screw per rib. Do not over-drive — washer should compress slightly, not flatten. Ruspert rustproof coating. 4.6★ from 476 reviews.
$17.99 for 300-pack
View on Amazon →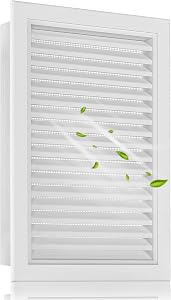
Ventilation
Zepoty 12"×18" Aluminum Louvered Gable Vent
Aluminum louvered vent with insect screen — explicitly marketed for containers, attics, and sheds. Install one at each gable end triangle for cross-ventilation; two vents provides adequate net free area for a single 40ft container attic. Pairs with a continuous soffit inlet gap at the eaves. Rust-resistant; pre-drilled for easy mounting. 4.7★ from 554 reviews.
$35.99 each (buy 2 for both gable ends)
View on Amazon →Hiring a contractor?
Download our free contractor interview questionnaire — 25 questions, 9 red-flag triggers, and a Hire / Pass verdict. Most contractors have never built a container home.
Need a container for your roof build?
Shipped.com shows new and used container prices from local suppliers with delivery included — compare before you buy.
Sources: "A-Frame Shipping Container Roof For My Neighbor," YouTube ID: qCY1ADz_Y14 · Mobile Modular Containers, "Shipping Container Roof Kits," mobilemodularcontainers.com · Discover Containers, "How to Select a Roof for Your Shipping Container Home," discovercontainers.com · SteelPRO PEB, "DIY Shipping Container Roof: Complete Guide," April 2025 · Off Grid Dwellings, "How Do Shipping Container Roof Kits Work?" December 2021 · Container Stop, "A Guide to Shipping Container Roofs," January 2026 · HomeGuide, "How Much Does It Cost to Frame a Roof?" June 2024 · Engineer Fix, "How to Build a DIY Shipping Container Roof," November 2025