The best insulation for a shipping container depends on your budget, climate, and how the container will be used. For habitable spaces, closed-cell spray foam is the gold standard — it insulates and solves the condensation problem in one step. For storage or tight budgets, rigid foam board is the best DIY option. Here's everything you need to choose and install the right method.
At a glance: shipping container insulation
Best overall method
Closed-cell spray foam
Cheapest DIY option
Rigid foam board (exterior)
Cost range (20ft container)
$1,400 – $9,000
Biggest mistake to avoid
Batt insulation without vapor barrier
In this guide
- The condensation problem — why it comes first
- Three insulation methods compared
- Exterior insulation — the overlooked approach
- Cheapest way to insulate a shipping container
- Shipping container insulation kits
- R-value requirements by climate
- Full cost breakdown
- Walls, floor, and roof — each surface covered
- DIY vs professional installation
The condensation problem — why it comes first
Steel containers are nearly airtight, and steel has high thermal conductivity. When warm, humid interior air meets the cold steel walls, moisture condenses on the surface — the same way a cold glass sweats on a warm day. In a container, this happens inside the wall cavity where you can't see it.
Condensation on steel = rust. Condensation on the wood floor = rot. Condensation trapped in air gaps = mold. In a humid climate, a poorly insulated container with no vapor barrier can develop significant mold problems within a single summer season.
The solution is insulation that also functions as a vapor barrier — eliminating the air gap where condensation forms. This is why closed-cell spray foam is the standard for habitable containers: it bonds directly to the steel, fills every gap, and provides a complete air and moisture barrier in one application. Other methods can work, but they require more care to achieve the same result.
Batt insulation without a vapor barrier is the #1 insulation mistake
Fiberglass or mineral wool batt has air gaps between the steel and the insulation where condensation forms on the metal. If you use batt insulation, a continuous vapor barrier against the steel is non-negotiable — and any gap at outlets, seams, or penetrations is a failure point. Most container insulation failures come from skipping or botching the vapor barrier with batt.
Three insulation methods compared
Closed-cell spray polyurethane foam (SPF)
Best for containersR-value per inch
R-6 to R-7
Highest of any common method
Cost installed (20ft)
$4,000–$9,000
Walls, ceiling, floor
Vapor barrier
Yes — built-in
No gaps possible
Closed-cell spray foam is sprayed directly onto the steel interior and expands to fill every corrugation and corner, bonding to the metal. It provides the highest R-value per inch of any common insulation, acts as a complete air and vapor barrier, and adds structural rigidity to the walls.
Why it's right for containers: The complete air seal eliminates the gap where condensation forms on steel. No separate vapor barrier is needed, and there's no way for moisture to penetrate between the insulation and the metal. Once properly installed, the condensation problem is solved permanently.
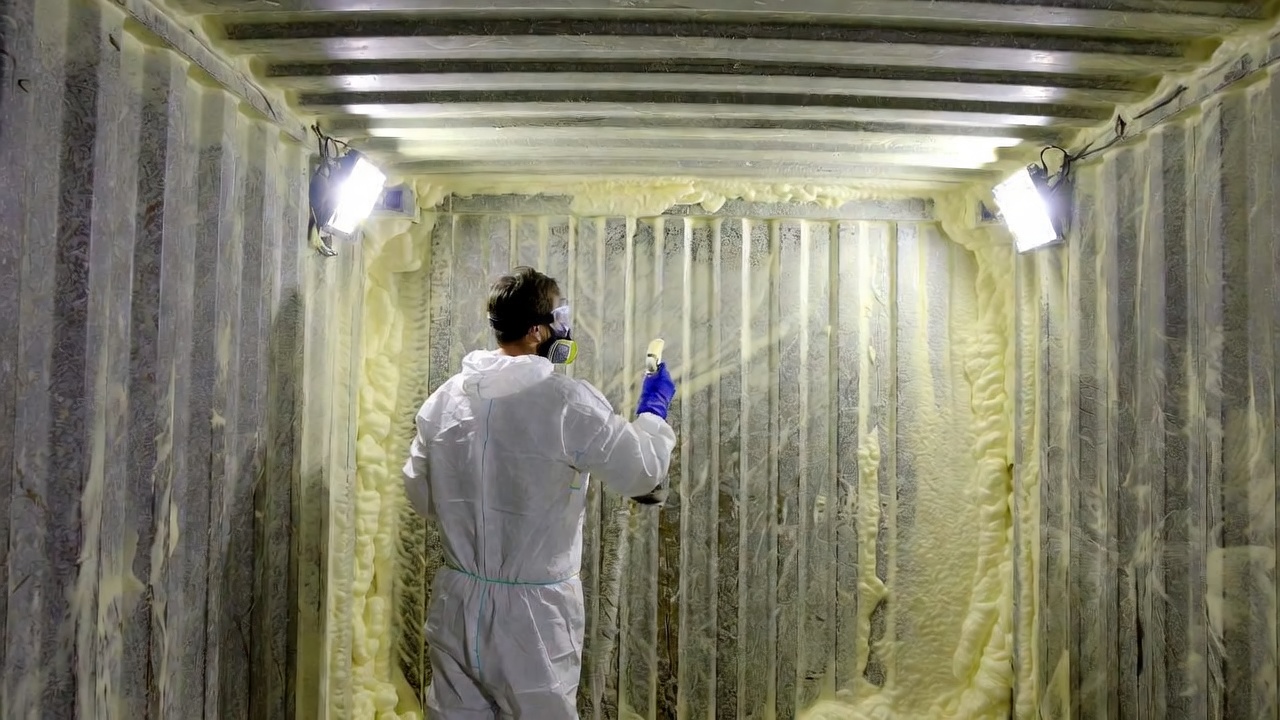
Downsides: Requires professional installation — the two-component system needs specialized equipment, proper PPE (off-gassing during application is toxic), and trained technique. Improperly applied foam is ineffective. Higher upfront cost than alternatives, reduces interior space, and is not removable if you need wall access later.
Rigid foam board (XPS, EPS, or polyiso)
R-value per inch
R-3.8 to R-6.5
Varies by product type
Cost installed (20ft)
$1,600–$5,000
Interior or exterior
Vapor barrier
Partial
Seams must be taped
Rigid foam boards can be installed on interior walls with adhesive or mechanical fasteners, or on the exterior of the container under cladding. Exterior installation is preferable — it keeps the thermal mass of the steel on the warm side, improves performance, and doesn't reduce interior space.
Product types: XPS (extruded polystyrene, e.g., Owens Corning Foamular) offers R-5/inch and good moisture resistance. EPS (expanded polystyrene, the white beaded foam) is cheaper at R-3.8–4/inch but absorbs more moisture. Polyiso (polyisocyanurate) gives R-6.5/inch and is the most efficient per inch but can degrade in very cold temperatures.
Downsides: All seams must be taped with foil tape to create a continuous vapor barrier — any gap is a condensation point. Interior installation requires a framing system to hold boards against corrugated walls. More labor-intensive than spray foam on complex shapes.
Batt insulation (fiberglass or mineral wool)
R-value per inch
R-3 to R-4.3
Lower than foam options
Cost installed (20ft)
$1,400–$3,500
Including framing and VB
Vapor barrier
Separate required
Critical — no shortcuts
Standard fiberglass or mineral wool batt is the most familiar and cheapest insulation type. It requires building a stud wall frame inside the container, installing a vapor barrier against the steel, filling with batt, then cladding over it.
When it works: In dry climates with minimal condensation risk, properly installed batt with a continuous vapor barrier can perform adequately. Mineral wool (e.g., Rockwool) is preferable to fiberglass — it's more moisture-resistant and doesn't lose R-value when wet.
Significant caveats: This is the riskiest method for containers. Any gap in the vapor barrier — at outlets, seams, or penetrations — creates a condensation path to the steel. The stud wall framing also loses 4–6 inches of interior width. Not recommended for humid climates or containers with significant temperature swings.
Exterior insulation — the overlooked approach
Most guides focus on interior insulation, but insulating the outside of a shipping container is often the better option — especially for storage use or when preserving interior space matters.
Exterior insulation wraps the container in rigid foam board (typically 2–4" of XPS or polyiso) before applying cladding — metal siding, wood, or stucco. This approach has several advantages over interior installation:
- No interior space lost — the insulation doesn't eat into your usable floor area
- Better thermal performance — the steel's thermal mass stays on the warm (interior) side, reducing temperature swings
- No vapor barrier complexity — insulation on the exterior means the steel never reaches the dew point of interior air
- Easier installation — flat exterior surfaces are easier to insulate than the corrugated interior walls
The main downside is cost — you need cladding over the exterior insulation, which adds material and labor. It also changes the look of the container significantly, which matters if you're placing it on a property where appearance is a factor.
For container homes and offices, a common approach is a hybrid: spray foam on the interior for vapor control, plus exterior insulation under cladding for additional R-value in cold climates.
Cheapest way to insulate a shipping container
If budget is the primary constraint, here are the three lowest-cost approaches in order:
#1 Cheapest
Exterior rigid foam board (DIY)
$800–$1,800 materials only
Apply 2" XPS board to exterior walls with construction adhesive. Tape seams with foil tape. Leave exposed (for storage) or add cheap metal siding over top. No framing required, no vapor barrier complexity. Works well for dry climates and non-habitable uses.
#2 Budget option
Interior rigid foam board (DIY)
$1,000–$2,200 materials + framing
Frame interior walls with metal furring strips (cheaper than studs), glue 2" XPS to the corrugated walls between furring, tape seams. More labor-intensive than exterior but keeps the weatherproof exterior intact. Better for permanently placed containers.
#3 DIY spray foam
Two-component foam kits
$400–$1,200 per kit (covers ~600 sq ft at 1")
DIY two-component spray foam kits (Touch 'n Seal, Foam It Green) can be used for small areas or thin flash coats, but covering an entire 20ft container to 2" requires 3–4 kits and significant skill. Better suited for gaps and spot application than full coverage.
Cheapest ≠ best for habitable spaces
The cheapest methods above are appropriate for storage containers or very dry climates. For a container you'll live, work, or sleep in — especially in a humid or cold climate — the condensation risk of improperly installed cheap insulation can cost far more to remediate than doing spray foam correctly the first time.
Shipping container insulation kits
Several manufacturers sell insulation kits designed specifically for shipping containers. These are primarily marketed at the DIY market for storage containers and range from basic liner kits to more comprehensive solutions.
Spray foam kits (two-component)
$400–$800 per kit
Touch 'n Seal and Foam It Green are the most common brands. Each kit covers approximately 600 sq ft at 1" depth. A full 20ft container (walls + ceiling) needs 3–4 kits for 2" coverage. Application requires proper PPE — full-face respirator, gloves, protective suit. Best for gaps, penetrations, and supplemental coverage rather than full walls.
Rigid board + reflective liner combo
$600–$1,500 for a 20ft container
Some suppliers sell bundles of rigid foam board with reflective foil-faced barriers. The reflective layer helps in hot climates by reflecting radiant heat. Brands like Prodex and SuperFOIL make foil-bubble-foil products marketed for container use. These provide R-values of 3–10 depending on thickness and air gaps — useful as a supplement to rigid foam, not a standalone solution.
Container liner/insulation blankets
$200–$800 per container
Quilted insulation blankets that hang from the ceiling and walls of the container. Originally designed for cargo protection (temperature-sensitive goods in transit), these provide minimal R-value (typically R-3 to R-6) but are easy to install and remove. Best for storage containers where you want some temperature moderation without permanent modification.
Spray foam with professional kit + rented gun
$1,500–$3,000 all-in
Some foam suppliers sell larger contractor kits with a proportioning gun for rent. With proper training and PPE, experienced DIYers can achieve close-to-professional results on walls and ceiling. This path is only recommended for those with prior spray foam experience — technique significantly affects cell structure and performance.
R-value requirements by climate
The R-value you need depends on your climate zone and use case. Containers in mild climates need far less insulation than those in the Midwest or Mountain West. These targets align with IRC standards for residential construction.
Hot / mild (zones 1–3)
Target: R-13 walls, R-19 roof
Southern states, coastal California, Florida, Texas Gulf Coast. Focus is on blocking radiant heat and managing humidity rather than cold. Spray foam at 2" (R-12–14) handles both. Reflective roof coating adds meaningful benefit here.
Mixed / moderate (zones 4–5)
Target: R-20 walls, R-30 roof
Pacific Northwest, Mid-Atlantic, interior South. Needs both heating and cooling performance. Spray foam at 3" (R-18–21), or rigid foam board at R-20+ on walls. Pay close attention to roof insulation — heat loss there exceeds walls in winter.
Cold / very cold (zones 6–8)
Target: R-30 walls, R-49 roof
Mountain states, upper Midwest, northern tier. Heating is critical. Spray foam at 4–5" (R-24–35) plus additional roof insulation. Exterior insulation layer strongly recommended to protect the steel's thermal mass and add R-value without sacrificing interior space.
Full cost breakdown
Costs below are for a standard 20ft container (approximately 1,400 sq ft of wall, ceiling, and floor surface area). A 40ft container runs roughly 1.8× these figures.
| Method | Materials (DIY) | Labor (pro) | Total — DIY | Total — Pro |
|---|---|---|---|---|
| Closed-cell spray foam (2") | N/A — requires pro | $3,300–$6,000 | — | $3,300–$6,000 |
| Closed-cell spray foam (3") | N/A — requires pro | $4,000–$9,000 | — | $4,000–$9,000 |
| Rigid foam board — exterior | $800–$1,500 | $800–$2,000 | $800–$1,800 | $1,600–$3,500 |
| Rigid foam board — interior | $1,000–$2,000 | $1,000–$2,500 | $1,000–$2,200 | $2,000–$4,500 |
| Batt + stud wall + vapor barrier | $800–$1,500 | $800–$1,800 | $800–$1,500 | $1,600–$3,300 |
| DIY spray foam kits (2") | $1,200–$2,400 | — | $1,200–$2,400 | — |
| Insulation liner/blankets | $200–$800 | $0 | $200–$800 | — |
For a container home or office, budget $4,000–$9,000 for proper spray foam installation on a 20ft container. Trying to cut costs here with cheaper methods is a common source of expensive remediation work later.
For a storage container in a temperate climate, $800–$2,000 in DIY rigid foam board is usually sufficient.
Walls, floor, and roof — each surface covered
Most insulation guides focus on walls and skip the two surfaces that matter most for thermal performance: the roof and the floor.
Walls
Primary focus — most sq footage
Corrugated steel walls are the largest surface area and the main thermal bridge. Interior insulation must account for the corrugation — spray foam fills the ridges naturally; rigid board requires furring strips to bridge them. Exterior installation on flat outer surface is easier. Typical target: 2–4" of closed-cell foam, or equivalent R-value with rigid board.
Roof
Highest heat loss in winter / gain in summer
The roof takes direct solar radiation in summer and is the largest heat loss surface in winter. It needs at least as much insulation as the walls, and ideally more. Options: spray foam applied to the underside of the roof from inside; rigid foam board laid on top of the roof under a metal cover; or a white roof coating (for hot climates only) that reflects 70–90% of solar radiation before it enters.
Floor
Often skipped — shouldn't be
The hardwood container floor sits on steel cross-members (outriggers) that conduct directly to the ground. In cold climates, floor heat loss is significant and the floor feels cold underfoot. The standard approach: 2" of rigid XPS foam board installed between the steel outriggers before any finished flooring. For a complete thermal break, add a layer of foam board over the outriggers too before installing new flooring on top.
DIY vs professional installation
Spray foam requires a professional without exception for full-container work. The two-component system requires specialized equipment, proper PPE (off-gassing during application is hazardous), and trained technique to achieve correct cell structure and density. Improperly applied spray foam can trap moisture rather than prevent it. This is one trade where DIY is not a realistic option for walls and ceilings — though DIY kits for gap-filling and small spot applications are practical.
Rigid foam board is a solid DIY project for anyone comfortable with basic construction. Measure and cut with a utility knife and straightedge, apply with foam-compatible construction adhesive, and tape every seam with foil tape. The key is a continuous vapor barrier with no gaps — check every penetration carefully.
Batt insulation with a stud wall is the most DIY-accessible but also the most risk-prone. If you go this route: use mineral wool over fiberglass, install a continuous 6-mil poly vapor barrier directly against the steel (warm side), and tape every seam and penetration. Never skip the vapor barrier to save time — it's the entire point of the system.
Get container pricing before you plan your insulation budget
The insulation approach depends on how you're using the container, your climate, and what you paid for it. Shipped.com lets you compare new and used container prices from local suppliers — useful context before planning the full fit-out budget.