This guide contains affiliate links. If you purchase through them, ContainerCompass earns a small commission at no extra cost to you. We only recommend products we'd stand behind for a real build.
Shipping container homes are unusually well-suited to solar power. The flat roof is a natural mounting platform, the steel structure is straightforward to ground, and the compact footprint keeps loads modest enough that a properly sized system can run the home entirely off-grid. This guide walks the full system — from calculating what you need, through panel and battery selection, to wiring the inside of the container — using Ryan's off-grid build in the Ouachita Mountains of Arkansas as the real-world example throughout.
Solar on a container home — at a glance
Typical system cost (20ft container)
$8,000 – $20,000
DIY savings vs hired installer
40 – 60%
Panels needed (modest loads)
4 – 8 × 400W panels
Battery type recommended
LiFePO4 (lithium iron phosphate)
In this guide
- Why container homes work well with solar
- Step 1 — Calculate your load
- Step 2 — Choose and size your panels
- Step 3 — Size your battery bank
- Step 4 — Inverter and charge controller
- Step 5 — Mount panels on the container roof
- Step 6 — Wire the system
- Step 7 — Inside electrical hookup
- Complete off-grid kits (240V)
- Full cost breakdown
- DIY vs professional installation
Why container homes work well with solar
The standard 20ft shipping container has a roof area of approximately 160 square feet — enough to mount 4–6 standard 400W panels in a flush or low-tilt configuration without overhanging the edges. The 40ft container doubles that to 320 square feet, comfortably accommodating a large system. Both sizes have structural steel frames strong enough to handle the panel weight without reinforcement.
Three things make containers especially solar-compatible:
- Flat roof with no penetration issues — unlike a pitched residential roof, you can run conduit down the exterior wall without complex flashing or waterproofing work
- Steel structure simplifies grounding — the container frame is an excellent ground plane; you're connecting to an already-bonded steel structure rather than driving ground rods through different materials
- Compact loads — a well-designed container home uses modest electrical loads; you're not trying to power a 2,500-square-foot house, which keeps the system size and cost manageable
Ryan's build — why off-grid made sense
Roadless land in the Ouachitas means no utility pole, no trenched conduit, no grid connection fee. The off-grid solar system wasn't a lifestyle choice so much as the only practical option — and at ~5 peak sun hours per day in the Ouachita region, Arkansas gives him genuinely good solar resources to work with.
Calculate your load
Load calculation is the foundation of system sizing — get this wrong and you'll either build an undersized system that leaves you in the dark or an oversized one that wastes money. Start by listing every device you'll run and its wattage, then estimate daily hours of use.
| Appliance | Typical watts | Hours/day | Daily Wh |
|---|---|---|---|
| LED lighting (4 fixtures) | 40W total | 5 hrs | 200 Wh |
| Laptop | 45–65W | 6 hrs | 330 Wh |
| Phone charging | 15W | 2 hrs | 30 Wh |
| 12V compressor fridge | 40–60W avg | 24 hrs | 960 Wh |
| Water pump (on-demand) | 60W | 0.5 hrs | 30 Wh |
| Fans (2 × ceiling) | 50W total | 8 hrs | 400 Wh |
| Small appliances (blender, misc) | 300W | 0.25 hrs | 75 Wh |
| Total daily consumption | — | — | ~2,025 Wh |
This table represents a modest single-person container home — similar to Ryan's setup. No air conditioning (the primary load that changes everything), no electric water heater, no electric cooking. Add any of those and your daily consumption can double or triple, requiring a much larger and more expensive system.
Air conditioning is the system-size multiplier
A small mini-split AC unit draws 700–1,200W and may run 6–10 hours per day in a hot summer — adding 4,000–12,000 Wh to your daily load. If you're in a climate where AC is necessary (like the Ouachitas in summer), either budget for a much larger solar system, use a propane or evaporative cooler instead, or accept that grid-tied with AC is more practical than off-grid with AC for most budgets.
Ryan's approach
Ryan's build avoids high-draw appliances entirely — no AC, no electric range, no electric water heater. His daily consumption likely falls in the 1,500–2,500 Wh range, which is what makes a manageable off-grid system feasible on a 170-square-foot container in Arkansas.
Choose and size your panels
To find how many panels you need, divide your daily consumption by your location's average peak sun hours, then add a 25% buffer for inefficiency losses (wiring resistance, inverter conversion, temperature derating).
Formula: (Daily Wh ÷ peak sun hours) × 1.25 = minimum array wattage
For Ryan's build at ~2,000 Wh/day in the Ouachitas (5 peak sun hours): (2,000 ÷ 5) × 1.25 = 500W minimum array. In practice you'd size up — a 1,200–2,000W array gives headroom for cloudy days and future load additions.
Minimal system
4 × 200W = 800W
LED lighting, phone/laptop charging, small fan. No refrigerator, no water pump. Good for occasional use or a very disciplined user.
Comfortable off-grid
4–6 × 400W = 1,600–2,400W
Lighting, laptop, 12V fridge, water pump, fans, small appliances. Ryan's approximate system territory — covers typical daily needs with battery buffer.
Full-featured / two people
8–10 × 400W = 3,200–4,000W
Above plus a small AC unit or electric cooking. Requires larger battery bank and higher-capacity charge controller and inverter throughout.
Panel type: Monocrystalline panels are the right choice for container roofs — higher efficiency per square foot means you can fit more wattage in the limited roof area, and they perform better in the partial shade that edge objects and roof penetrations can create. Avoid polycrystalline for a space-constrained roof.
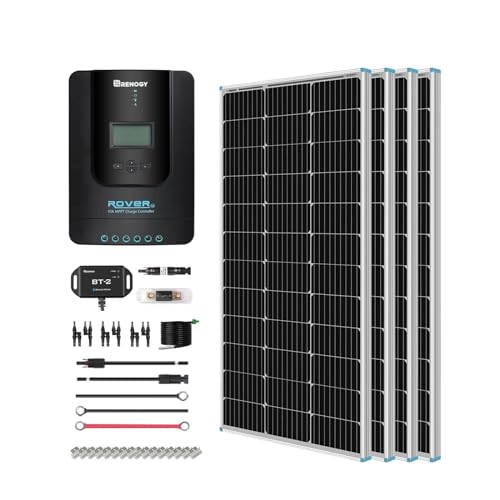
Panels — Editor's pick
Renogy 400W Monocrystalline Solar Panel
One of the most widely used panels in the off-grid container home community. 400W output, pre-drilled mounting holes, MC4 connectors, 25-year power output warranty. Compact enough that four panels fit comfortably on a 20ft container roof with room to spare. Available in quantity packs for system builds.
~$220–$260 per panel · 4-panel starter kit ~$900
View on Amazon →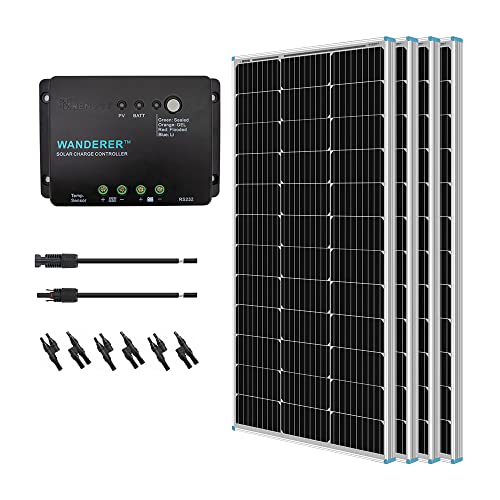
Budget alternative
ECO-WORTHY 200W Monocrystalline Panel (2-pack)
A solid budget option for smaller systems or when you want to start small and expand. Lower efficiency than Renogy but a proven panel at a lower entry price. Good for a minimal lighting and device-charging system on a storage or occasional-use container.
~$130–$160 for 2-pack (400W total)
View on Amazon →Size your battery bank
Your battery bank needs to cover your loads through the night and through cloudy periods — typically 1–3 days of autonomy for a well-designed off-grid system. The formula: (Daily Wh × autonomy days) ÷ depth of discharge = usable battery capacity needed.
For Ryan's 2,000 Wh/day with 2 days autonomy and 80% DoD on LiFePO4: (2,000 × 2) ÷ 0.80 = 5,000 Wh (5 kWh) usable capacity. A common configuration to achieve this is two 100Ah 48V LiFePO4 batteries (9.6 kWh total, 7.7 kWh usable at 80% DoD — giving comfortable headroom).
LiFePO4 (lithium iron phosphate)
RecommendedPros: 3,000–6,000+ cycle life (10+ years), 80–100% depth of discharge, no maintenance, performs well in heat, lighter than lead-acid, built-in BMS protection.
Cons: Higher upfront cost — roughly 2–3× lead-acid per kWh. Worth it for a permanent installation where cycle life matters.
Ryan's situation: For a permanent off-grid home used daily, LiFePO4 is the only battery chemistry that makes economic sense over a 10-year horizon.
AGM / sealed lead-acid
Pros: Lower upfront cost, widely available, no special charging requirements, proven technology.
Cons: 500–800 cycle life, only 50% usable depth of discharge, heavier, temperature-sensitive, replacement cost negates savings over time for daily-use systems.
Best for: Seasonal or occasional-use containers where the battery will sit unused for months at a time and cycle count stays low.

Battery — Top pick
Ampere Time (LiTime) 100Ah 12V LiFePO4 Battery
One of the most popular LiFePO4 batteries in the off-grid container home community. Built-in 100A BMS, rated for 4,000+ cycles, handles temperatures down to -4°F. Wire two in series for 24V systems or four for 48V. Solid warranty and widely available replacement support.
~$220–$280 per 100Ah battery · Two for a starter bank ~$500
View on Amazon →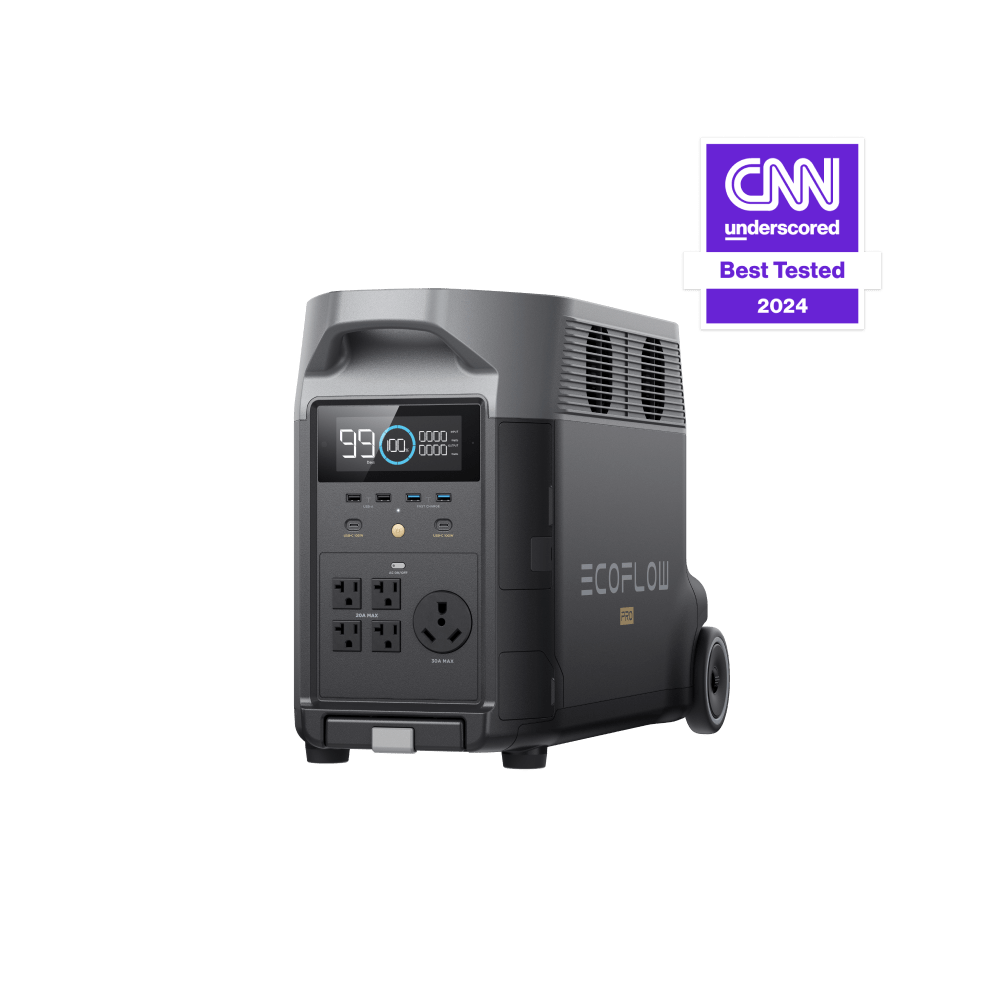
All-in-one alternative
EcoFlow DELTA Pro Portable Power Station
For builders who want a simpler setup, EcoFlow's DELTA Pro units combine battery, BMS, inverter, and charge controller in a single unit. Less DIY flexibility but dramatically simpler installation — plug your panels in, plug your loads in, done. Expandable with additional battery modules. Good for builds where simplicity matters more than cost-per-kWh.
~$2,500–$3,200 per unit (3.6 kWh base)
View on Amazon →Inverter and charge controller
These two components sit between your panels/batteries and your loads. The charge controller manages power from the panels into the batteries. The inverter converts DC battery power to 120V AC for your outlets and appliances.
MPPT charge controller
Use this typeMaximum Power Point Tracking controllers extract 15–30% more energy from your panels than PWM controllers by continuously optimizing the voltage/current relationship. On a permanent installation, MPPT pays for itself quickly in recovered generation.
Size rule: Controller amperage = (total panel wattage ÷ battery bank voltage) × 1.25. For a 1,600W array on a 24V bank: (1,600 ÷ 24) × 1.25 = 83A controller minimum.
Pure sine wave inverter
Always use a pure sine wave inverter — not modified sine wave — for a container home. Modified sine wave damages sensitive electronics (laptops, phone chargers, some LED drivers) and runs motors inefficiently. The price premium for pure sine is minimal and always worth it.
Size to peak load: Size the inverter to handle your largest simultaneous load. A 2,000W inverter covers most modest container home loads; 3,000W gives comfortable headroom.
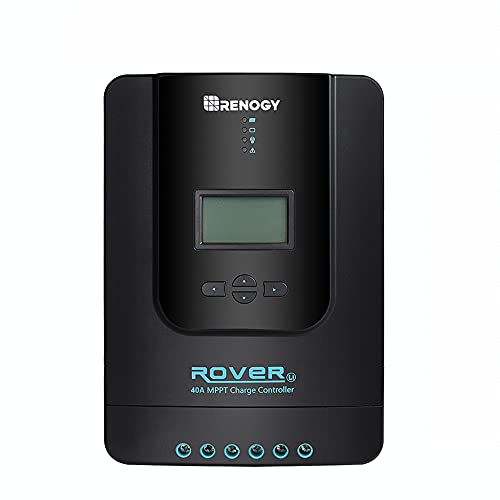
Charge controller — Top pick
Renogy Rover 40A MPPT Solar Charge Controller
A well-regarded MPPT controller suitable for systems up to ~1,300W at 12V or 2,600W at 24V. LCD display, compatible with LiFePO4 battery profiles, Bluetooth monitoring option. Renogy's ecosystem integrates cleanly with their panels. Step up to the 60A model for larger arrays.
~$90–$120 (40A) · ~$140–$180 (60A)
View on Amazon →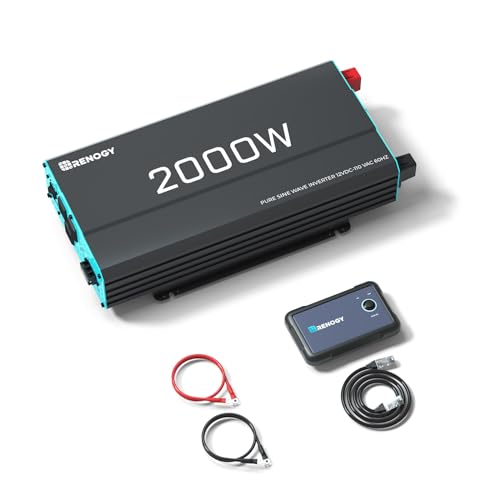
Inverter — Top pick
Renogy 2000W Pure Sine Wave Inverter
2,000W continuous (4,000W surge) handles all typical container home loads including the refrigerator startup surge. Multiple AC outlets, USB ports, remote on/off, overload and overheat protection. Pairs naturally with Renogy's panels and charge controllers if you're building a single-brand system.
~$200–$260
View on Amazon →Mount panels on the container roof
The corrugated steel container roof is strong enough to walk on and handle the panel load (typically 2–4 lbs/sq ft) without reinforcement. The main decisions are tilt angle, mounting method, and how to run conduit to the interior.
- Flat mount vs tilted: Flat mounting (0–5°) is simpler and lower-profile but loses some annual production. A tilt angle equal to your latitude (roughly 35° for Arkansas) maximizes annual output but adds wind load and height. For a container home, a low-tilt mount at 10–15° is a practical compromise — better production than flat, lower wind profile than optimal tilt.
- Mounting rails: Z-brackets or tilt-mount rail systems bolt through the roof with stainless steel hardware. Use EPDM washers under every penetration and seal with self-leveling silicone to prevent leaks. Run a bead of Dicor or similar on every roof penetration annually.
- Conduit run: Route DC wiring down the exterior wall in liquid-tight flexible conduit (LFMC) before entering the container through a weatherproof gland fitting. Keep DC runs as short as possible — longer runs mean voltage drop and thicker (more expensive) wire requirements.
Mounting hardware
Renogy Z-Bracket Mounts (Set of 4)
Universal aluminum Z-brackets for flush or low-tilt panel mounting on flat metal roofs. Stainless steel hardware included. Each set handles one panel; order one set per panel. Straightforward installation with a drill and basic hand tools.
~$15–$25 per set of 4
View on Amazon →Wire the system
Solar system wiring follows a standard sequence: panels → charge controller → battery bank → inverter → AC loads. DC wiring between components must be sized for the current at the system voltage — undersized wire is a fire hazard and a common DIY mistake.
Use MC4 connectors between panels. Wire panels in series (higher voltage, thinner wire) or parallel (higher current, thicker wire) depending on your charge controller's voltage range. Most MPPT controllers accept series strings up to 150V; check your controller's specs. Use 10 AWG or thicker for runs under 20ft at typical system voltages.
This is the highest-current segment of the DC system. Use 4 AWG or thicker cable (2/0 AWG for 48V high-current systems). Install an appropriately rated fuse or breaker within 18 inches of the battery positive terminal — this is an NEC requirement and a fire safety critical point. Keep this cable run as short as possible.
The inverter draws the highest instantaneous current in the system (especially during startup surges). Use 2/0 or 4/0 AWG welding cable — oversized is fine, undersized is dangerous. Keep this run under 6 feet if at all possible. Install a DC disconnect or appropriately rated fuse between battery and inverter.
The steel container frame is an excellent ground plane. Connect your system ground to the container frame at a clean, unpainted metal-to-metal contact point. Drive a ground rod (8ft copper-clad) into the earth adjacent to the container and connect to the frame. This is both a safety requirement and a lightning protection measure.
Every DC circuit needs overcurrent protection. Install a main DC disconnect between the battery bank and the rest of the system. Fuse each panel string at the array. Use a bus bar for clean, safe battery connections rather than daisy-chaining terminals. Label every circuit.
Wiring essentials
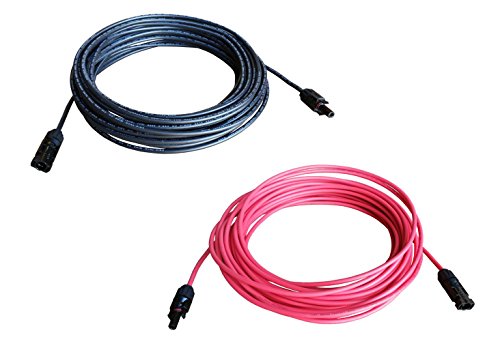
WindyNation 100ft 10 AWG Solar Cable + MC4 Connectors
Pre-made solar-rated cable (USE-2 / THWN-2 rated) in red and black, with MC4 connectors for panel connections. 10 AWG is appropriate for most panel-to-controller runs under 20ft. For battery and inverter connections, step up to 4 AWG or 2/0 AWG welding cable purchased separately.
~$35–$55 per 100ft roll
View on Amazon →Inside electrical hookup
The inverter output connects to a standard AC subpanel inside the container, which distributes power to outlets, lights, and fixed appliances exactly like a conventional residential electrical system. This is the part that most closely resembles conventional wiring.
- Subpanel: A small 60A or 100A subpanel inside the container receives 120V AC from the inverter and distributes it via standard breakers. Size the breakers to match each circuit's expected load.
- Wire before you insulate: All interior wiring should be roughed in before spray foam insulation is applied — conduit runs, outlet boxes, and light fixture boxes should all be in place first. You cannot add wiring after spray foam without cutting through it. See our complete container wiring guide for the full inside electrical walkthrough.
- Use NM-B (Romex) or conduit: Inside a spray-foam-insulated container, standard NM-B cable in a code-compliant installation is acceptable. In an uninsulated container or one with exposed steel, conduit (EMT or liquid-tight) is required.
- USB and 12V outlets: Consider wiring some outlets as direct 12V DC rather than routing through the inverter — this is more efficient for device charging and eliminates the conversion loss. USB-A/USB-C outlet panels mount in standard electrical boxes and run directly from the battery bank.
Inside electrical
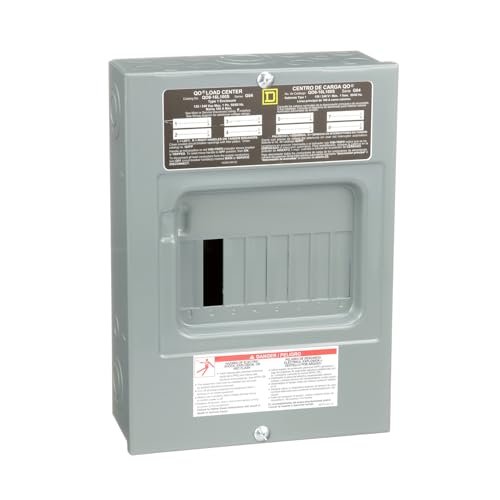
Square D QO 8-Space 16-Circuit Load Center
A compact 8-space load center appropriate for a small container home. Accepts standard 120V single-pole breakers. Receives the inverter AC output on the main lugs (or use a main breaker for a disconnect). More than enough circuits for lighting, outlets, and a few dedicated appliance circuits in a 170–320 sq ft container home.
~$50–$80
View on Amazon →Complete off-grid kits — when you need 240V
Everything above is built around a 12V or 24V system: a few panels, a couple of batteries, an inverter in the 2,000W range. That's the right architecture for a workshop, a storage container, a weekend cabin, or a container home with modest loads.
It stops being the right architecture the moment you need 240 volts. A well pump, a mini-split above a certain size, an electric water heater, a dryer, a welder — these want split-phase 120/240V, and a 12V system with a 2,000W inverter cannot supply them at any battery capacity. This is the single most common reason a container home solar plan has to be redesigned partway through.
The question that decides your architecture
Write down every appliance and note the voltage. If everything runs on 120V and your continuous draw stays under about 2,000W, build the 12V or 24V system described above — it's cheaper, simpler, and easier to service. If anything on the list needs 240V, you need a 48V system with a split-phase inverter, and you should design for that from the start rather than upgrading into it.
Why a kit rather than components
At this scale, matching an inverter to a battery bank to an array is genuinely difficult, and getting one component wrong wastes the others. A kit trades that risk for accepting someone else's ratios. The trade is usually worth it for a first system — provided you understand what the ratios actually are, which is where most kit listings are unhelpful.
ContainerCompass earns a commission on qualifying purchases at no extra cost to you. We've read the component datasheets for both kits below and the notes reflect what they say, including where they disagree with the product listing.
⚠️ Check UL 1741 before you order — this affects permitting
The SPH6548P inverter used in both kits below lists IEC and EN certifications on its datasheet rather than UL 1741. For an off-grid workshop or barn that usually doesn't matter. For a permitted habitable dwelling, it can matter a great deal — some inspectors require UL-listed equipment, and some insurers ask about it after a claim. If your container build is going through inspection, confirm the current listing status with SunGoldPower before ordering, and confirm with your building department what they'll accept. See our permits guide for how equipment listing fits into the wider approval process.
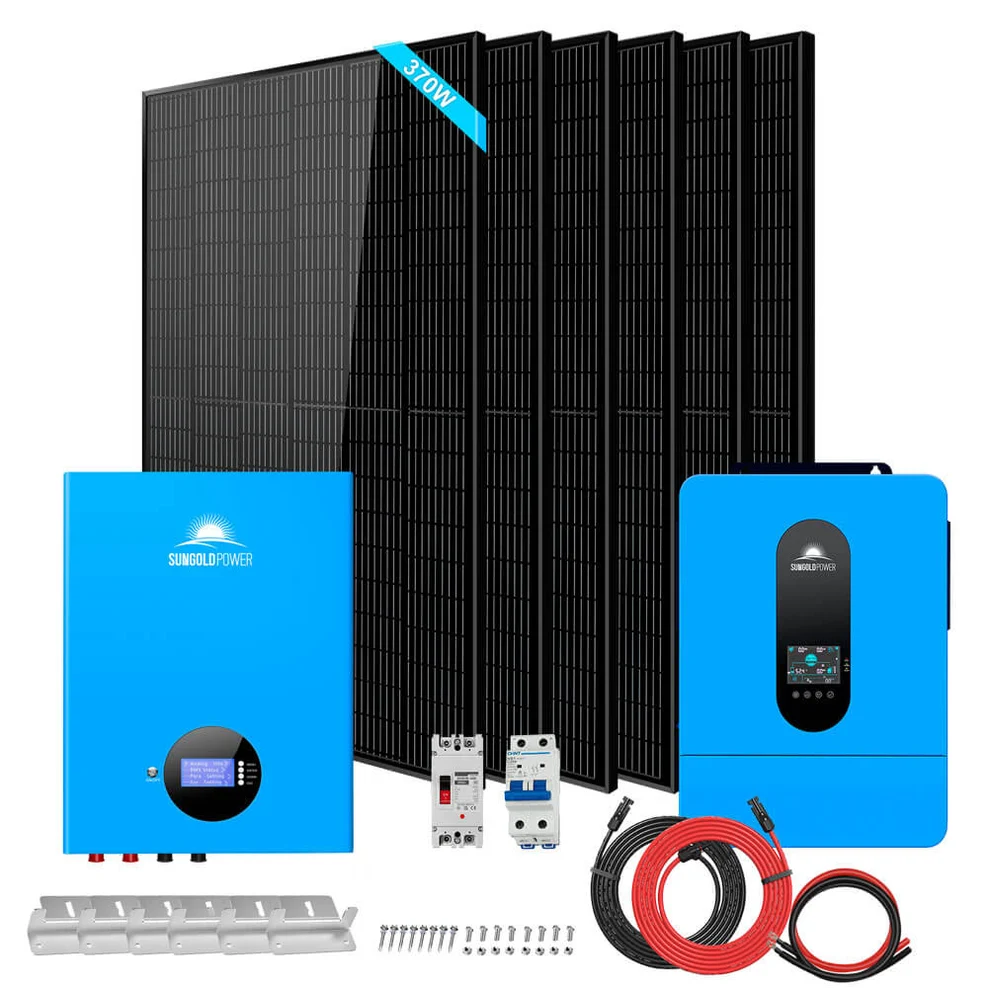
Best value 48V kit — get the two-battery variant
SunGoldPower SGM-6510M — 6500W, 10.24 kWh, 120/240V
6500W split-phase inverter, 370W panels, and a wall-mount 51.2V battery. The important detail is that this listing has two variants and they are not equivalent. The cheaper single-battery SGM-655M is current-limited by its battery to roughly 4,300–5,100W continuous — about two-thirds of what the inverter is rated for — and it can't support the 13,000 VA surge that covers motor starting. Choose the 10.24 kWh SGM-6510M variant with two batteries.
The battery is the strongest part of this kit and it's properly documented: 100A continuous, 7,000+ cycles at 80% depth of discharge, 15-year design life, and it parallels up to 16 units if you expand later. Note that the listing says six panels while its own URL and meta description say four — worth confirming panel count in writing before you order.
6500W inverter · 10.24 kWh · 120/240V split-phase · expandable to 10,000W of PV
View the kit — select 10.24 kWh →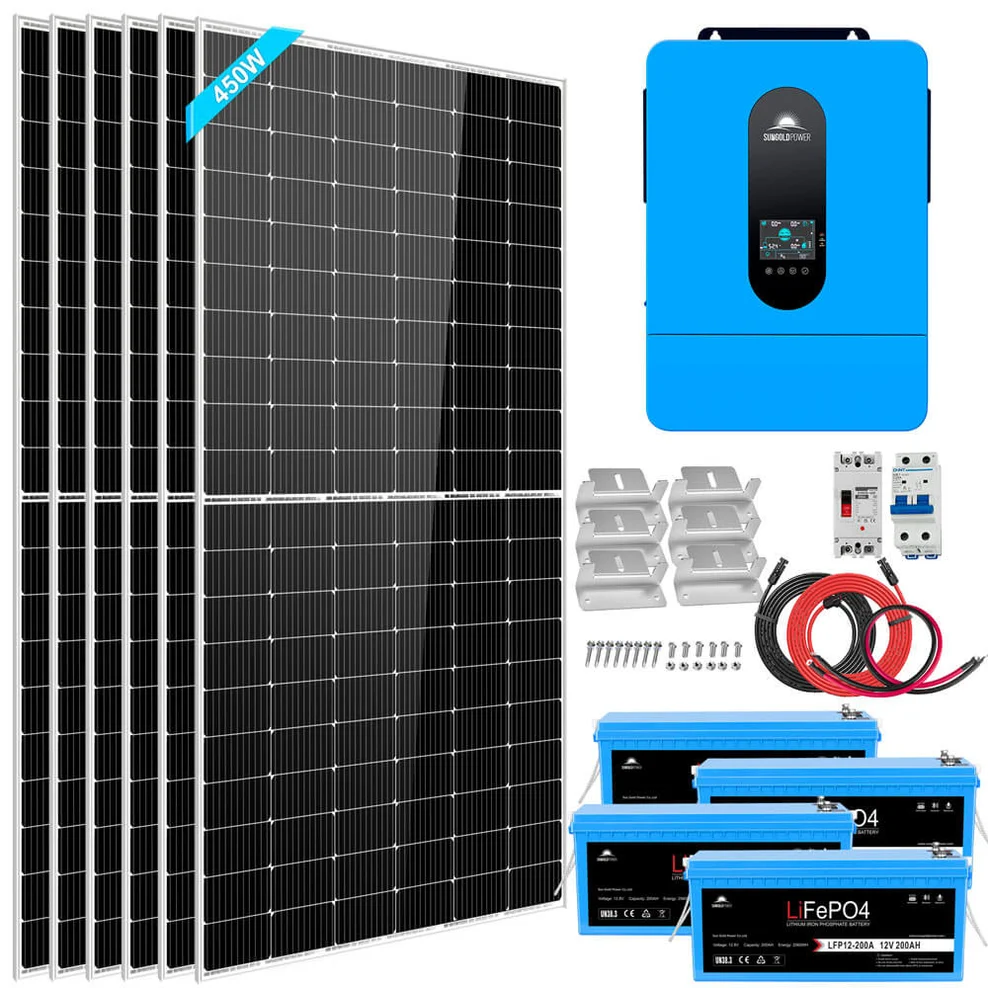
Larger array — if you have the roof for it
SunGoldPower SGK-65PRO — 6500W, 2,700W array, 10.24 kWh
Same 6500W split-phase inverter and the same 10.24 kWh of storage, but with a larger 2,700W array of 450W panels and four 12V 200Ah LiFePO4 batteries in series. The reason to choose this over the SGM-6510M is the extra panel capacity — worth it if you have 2,700W of unshaded south-facing space and want to harvest more on short winter days.
The reason to think twice is architecture. Four 12V batteries in series is a less flexible arrangement than the wall-mount units in the other kit, and the supplied manual doesn't state a discharge current limit — which is the number that determines whether you can actually pull 6,500W. Worth asking before ordering. On paper this kit costs meaningfully more than the SGM-6510M for the same inverter and same storage.
6500W inverter · 2,700W array · 10.24 kWh · 13,000 VA surge
View the SGK-65PRO →The expansion headroom is the real value here
Both kits use an inverter rated to accept 10,000W of PV, and both ship with well under a third of that. That means the cheapest sensible upgrade path isn't a bigger kit — it's adding panels to the kit you already have. Buy for the inverter and battery architecture you'll need in five years, then grow the array as budget allows. Panels are the easiest component to add later; the inverter is the hardest to replace.
⚠️ 48V systems are not DIY electrical work
A 48V battery bank at this capacity can deliver hundreds of amps into a short circuit. That's enough to start a fire or cause serious injury, and it behaves nothing like the 12V systems most DIY guides cover. Use a licensed electrician for the battery and AC side regardless of how much of the rest you do yourself, and check whether your jurisdiction requires a permit and inspection for the installation.
Full cost breakdown
Costs below are for a complete off-grid solar system on a 20ft container home — roughly equivalent to Ryan's Ouachita build — using quality components at current (July 2026) pricing. Installer labor is not included in the DIY column.
| Component | Spec (modest system) | DIY cost | Installed cost |
|---|---|---|---|
| Solar panels | 4 × 400W monocrystalline | $900–$1,100 | $1,400–$1,800 |
| Battery bank | 4 × 100Ah 12V LiFePO4 (in series/parallel for 24V 200Ah) | $900–$1,200 | $1,400–$1,800 |
| Charge controller | 60A MPPT | $140–$180 | $250–$350 |
| Inverter | 2,000W pure sine wave | $200–$280 | $350–$500 |
| Mounting hardware | Z-brackets, rails, roof hardware | $80–$150 | $150–$250 |
| Wiring, conduit, fusing | MC4 cables, DC wire, bus bars, breakers | $200–$350 | $400–$600 |
| Inside panel + wiring | 60A sub-panel, Romex, outlets, fixtures | $300–$500 | $800–$1,500 |
| Miscellaneous | Connectors, sealant, tools, contingency | $150–$300 | — |
| Total — modest system | 1,600W array, ~5 kWh storage | $2,870–$4,060 | $4,750–$6,800 |
| Total — full-featured system | 3,200W array, ~10 kWh storage | $5,500–$8,000 | $9,000–$14,000 |
Ryan's build — estimated system cost
Based on the system description in Kirsten Dirksen's documentation, Ryan's Ouachita build falls in the $8,000–$14,000 range for the complete off-grid system including solar, batteries, inverter, and inside electrical — consistent with the full-featured DIY estimate above, given the permanence and completeness of his off-grid setup.
DIY vs professional installation
The panel mounting and system wiring is achievable DIY for anyone comfortable working at height and with basic electrical concepts. The DC wiring between panels, controller, batteries, and inverter is low-voltage work that doesn't require an electrical license in most states — though local codes vary and should be verified.
The inside AC electrical work is where licensing matters. Most jurisdictions require a licensed electrician to install the AC subpanel and branch circuit wiring, or at minimum to inspect and sign off on DIY work. Pulling a permit and having the work inspected is strongly recommended — it protects you on insurance claims and resale, and the inspection catches mistakes before they become fires.
What to DIY vs hire out:
- DIY-friendly: Panel selection and ordering, mounting hardware installation, DC wiring between panels/controller/batteries, battery bank assembly, inverter mounting
- Consider hiring: AC subpanel installation, branch circuit wiring, permit applications, final inspection
- Always hire: Any work involving the main service entrance or utility connection (not applicable for off-grid but relevant for grid-tied)
Read the electrical guide before you start wiring
Our shipping container electrical guide covers the full inside wiring sequence — panel sizing, circuit planning, grounding, and NEC code requirements — all directly applicable once your solar system is delivering AC power to the container.
Need a container for your solar build?
Shipped.com supplies new and used containers across the US. Compare prices and delivery options from local suppliers before you buy.