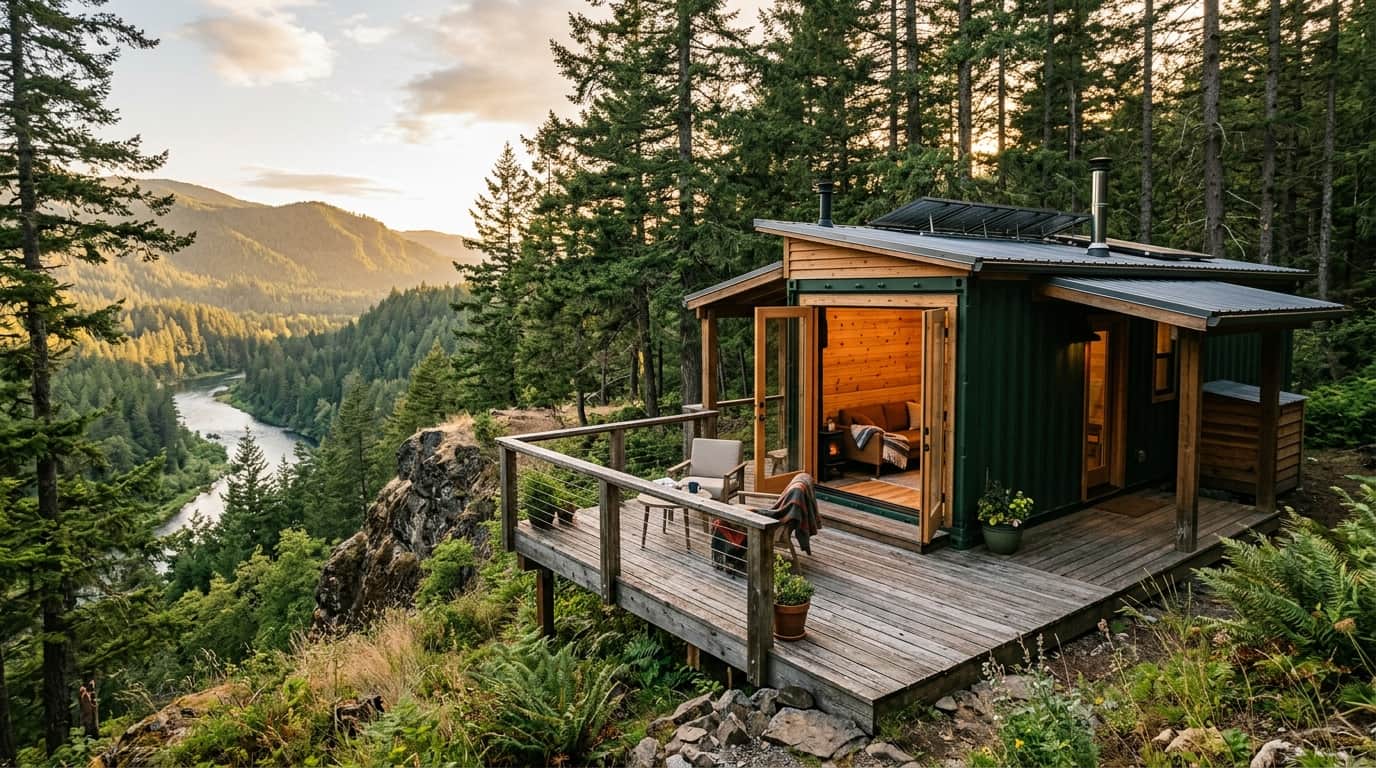
Matt and Paiton were 23 years old and had never built anything when they started converting a 45-foot high cube shipping container into a home on a river bluff in northern Washington. Nine months later — working only on weekends and days off from their regular jobs — they had a fully finished, furnished, and appliance-equipped home that cost $20,000 total. The container itself was $4,500. Everything else — insulation, interior finish, kitchen, bathroom, bedroom, deck — came from salvage yards, Facebook Marketplace, YouTube tutorials, and a relentless willingness to figure things out.
This is one of the most documented budget container builds on the internet, covered by Tiny House Expedition, Autoevolution, and multiple tiny living publications since the original video tour published in 2020. What makes it worth studying isn't just the number — it's the specific decisions that produced the number, and whether those decisions are replicable.
In this case study
▲ Original tour filmed by Tiny House Expedition (Alexis Stephens and Christian Parsons), published October 2020. Cost data and analysis below from ContainerCompass.
Backstory — from school bus to container
Matt and Paiton didn't arrive at their container home through a conventional path. Before the build, Matt had lived off-grid in a converted school bus for roughly a year — a skoolie. Both were part of the tiny house community and had genuinely internalized the philosophy of living with less before they ever started cutting steel.
That background mattered. The school bus gave them real-world experience in small-space living: how to think about storage, how to stay warm in a poorly insulated metal box in the Pacific Northwest, how to cook in a tiny kitchen, and — crucially — how to approach a building project without professional guidance. When they decided to sell the bus and build something more permanent, they weren't starting from zero.
They researched yurts, geodesic domes, and timber frames before landing on a shipping container. The logic was simple: for approximately $4,500, they could own a structurally complete, weathertight steel box that arrived as a finished shell — no framing, no roofing, no siding required. The roof doesn't leak. The walls are solid steel. You can move in rough form and finish from the inside at your own pace.
Why they chose a 45-foot high cube specifically
A standard shipping container is 8'6" tall; a high cube is 9'6" — a full foot taller. After insulation and interior ceiling treatment, a standard container drops to roughly 7'–7'6" finished ceiling height — below the 7'6" minimum required by the IRC for habitable rooms, and cramped by any measure.
A high cube, after the same treatment, delivers 8'+ finished ceilings — comfortable, code-compliant, and psychologically much more livable. For anyone converting a container to a home, the high cube is not optional. Matt and Paiton recognized this before purchasing and specified a high cube from the start. The 45-foot length (vs. the more common 40-foot) added approximately 60 square feet of interior space — the difference between a tight layout and one that breathes.
The land decision
Finding and converting the container was only half the challenge. They also needed land in a state where zoning for alternative dwellings varies sharply by county. They found a 5-acre parcel in northern Washington with river frontage on the Pend Oreille River and secured it through a lot loan — a real estate product designed for raw or rural land purchases.
The financial logic was immediate: their monthly land payment came in $300–$400 less than what a one-bedroom apartment in the same area rented for. They weren't just saving on housing costs — they were building equity in 5 acres of Washington land with river views while paying less per month than rent.
The container: specs, placement, and foundation
| Spec | Detail |
|---|---|
| Type | 45-foot high cube (9'6" tall) |
| Interior dimensions | ~44'5" L × 7'8" W × 8'10" H (before interior finish) |
| Floor area | ~308 sq ft |
| Condition | Used / cargo-worthy |
| Purchase price | $4,500 (2019–2020) |
| Current market equivalent | $4,500–$7,500 depending on location and condition |
| Foundation type | Pier foundation (concrete blocks under corner posts) |
| Orientation | Positioned for upstream and downstream river views from both ends |
Placement — the one irreversible decision
Matt and Paiton didn't simply drop the container where it was convenient. They placed it deliberately on the river bluff to capture views both upstream and downstream from inside the home. This orientation decision shaped everything: which end became the bedroom (with large doors opening to the river), and which end became the kitchen and living zone.
Once the container is set and connected to utilities, repositioning it is a crane job. Think through orientation before it arrives. Which direction does morning sun come from? Where are the prevailing winds? What's the best view? Where do you want shade in summer?
— ContainerCompass analysis
The container also sits on a bluff so that the attached deck extends naturally over the slope — creating the sensation of being suspended above the river without any additional engineering cost. That effect costs nothing if you plan for it; it's impossible to add afterward.
Interior layout — zone by zone
For 308 square feet, the layout punches well above its weight. The container is organized into three distinct zones along its long axis, with every element chosen to serve at least two purposes.
Kitchen / Island Zone
The centerpiece is a custom multi-function island bar that serves as dining table, home office, laundry folding surface, and appliance housing — the stacked washer and dryer live below the bartop, completely hidden when not in use.
The island facing is finished with reclaimed tin ceiling tiles — sourced from a salvage yard and applied vertically rather than on a ceiling. The effect is industrial-meets-vintage and cost a fraction of tile or stone. It's the most photographed feature of the build.
Living Room
An L-shaped sectional sofa doubles as a guest bed. Wall-mounted TV preserves floor space. A floating mantle shelf adds display depth without protruding far into the room.
The standout feature: a moon phase mirror wall behind the sofa — small mirrors arranged to represent lunar phases. Inexpensive, completely original, and deeply personal. The mirrors reflect light back into the room, making the narrow space feel larger.
Heating: a mini wood stove provides radiant heat — efficient and cozy, requiring only a chimney penetration through the container roof, planned in from the start.
Bathroom
Separated from the living area by a sliding barn door — no swing clearance required, recovering 6–8 sq ft of usable floor space vs a hinged door. Remarkably generous by tiny house standards:
- Large vanity with full cabinet storage
- Standard flush toilet (not composting)
- Custom shower: MDF panels coated in epoxy — a marble-look finish for a fraction of tile cost, waterproof and easy to clean
- Integrated laundry hamper
Bedroom — The River Retreat
The bedroom occupies the far end of the container. Its defining feature: the original container doors (or large french-style doors) open the entire end wall to the Pend Oreille River and surrounding forest. When open, the bedroom dissolves into the landscape.
Furnishings: queen-size bed with his-and-hers closets flanking both sides. A portable AC unit handles summer cooling without ductwork. The river view is the room's primary feature — and it cost nothing beyond the placement decision made before the container arrived.
The barn door math
A sliding barn door costs approximately the same as a standard hinged door but recovers 6–8 square feet of floor space that would otherwise be lost to the door swing arc. In a 308 sq ft home, that's nearly 3% of the total interior. Every square foot in a space this size is meaningful — the barn door is one of the highest-ROI decisions on the build.
The $20,000 budget breakdown
Twenty thousand dollars all-in — including all furniture and appliances — is an extraordinary number. It was achieved through a specific, repeatable philosophy applied to every purchasing decision, not through luck or unique access to free materials.
| Category | Estimated cost | Notes |
|---|---|---|
| Container (45-ft high cube, used) | $4,500 | The confirmed figure from multiple sources |
| Crane delivery and placement | $800–$1,500 | Half-day crane hire; site required access clearing |
| Foundation (pier blocks) | $300–$600 | Concrete piers under corner posts; DIY-installed |
| Insulation (spray foam + rigid) | $1,500–$2,500 | Critical for Pacific Northwest cold and condensation control |
| Interior wall finish (tongue-and-groove) | $800–$1,500 | Mix of salvage and lumber yard; DIY installed |
| Electrical rough-in and fixtures | $800–$1,500 | May have used licensed electrician for panel work |
| Plumbing rough-in and fixtures | $1,000–$2,000 | Includes bathroom, kitchen, water heater |
| Kitchen (island, cabinetry, appliances) | $1,500–$2,500 | Heavy salvage sourcing; tin tiles, reclaimed cabinets |
| Bathroom (vanity, toilet, MDF/epoxy shower) | $800–$1,500 | Custom shower technique kept costs very low |
| Windows and doors | $500–$1,200 | Includes cutting openings; bedroom end uses original container doors |
| Mini wood stove and chimney | $400–$800 | Primary heat source; chimney penetration through container roof |
| Deck (wraparound, ~360 sq ft) | $1,500–$3,000 | Basic lumber; DIY construction; extends over river bluff |
| Furniture and appliances | $1,500–$3,000 | Sectional sofa, washer/dryer, TV, bedroom furniture — heavy salvage sourcing |
| Miscellaneous (tools, hardware, finishes) | $500–$1,500 | Fasteners, paint, adhesives, sealants, lumber yard runs |
| Total (estimated) | ~$20,000 | Confirmed by builder and multiple independent sources |
The container at $4,500 was 22.5% of the total budget. The remaining 77.5% — approximately $15,500 — produced a fully finished, furnished, and livable home. That ratio is only achievable through the salvage philosophy described below.
What this costs to replicate today
Matt and Paiton built in 2019–2020. Material and labor costs have increased since then. A realistic estimate for the same build today:
| Region | Estimated 2026 equivalent | Key cost drivers |
|---|---|---|
| Pacific Northwest (WA, OR) | $28,000–$40,000 | Higher labor and material costs; strong salvage market offsets somewhat |
| Southeast (AL, TN, GA) | $22,000–$32,000 | Lower labor rates; good salvage availability; milder climate reduces insulation cost |
| Texas | $24,000–$34,000 | Strong container market (port access); heat management adds HVAC cost |
| Midwest (KS, MO, IA) | $25,000–$36,000 | Cold climate requires heavier insulation; lower labor costs |
| Northeast (NY, MA, CT) | $35,000–$55,000 | High labor costs; stricter permitting; expensive container market |
The salvage philosophy — the real cost-reduction strategy
The $20,000 figure is not achievable through smart retail shopping. It requires a fundamentally different approach to sourcing building materials: free and salvage first, retail only as a last resort.
The tin tile example — making salvage work harder
The tin ceiling tiles Paiton used on the island bar were not purchased for that purpose. They were acquired as ceiling tiles and repurposed for a vertical application on the island facing. This kind of creative material reassignment — finding what's cheap or free, then figuring out what it could be rather than what it was — is the heart of the budget build philosophy.
Other examples from this build: using the original container doors as the bedroom entry rather than installing new ones; using a mini wood stove rather than a mini-split system for heating; the MDF-and-epoxy shower rather than tile. Every material decision started with "what do we have or can we get cheap?" rather than "what does the design specify?"
The primary salvage channels Matt and Paiton used:
- Architectural salvage stores: doors, windows, hardware, light fixtures, plumbing fixtures, cabinetry — all pulled from demolition projects at a fraction of retail. A vintage barn door worth $400 new might be $40–$80 salvage.
- Facebook Marketplace and Craigslist free sections: old kitchen cabinets, flooring, appliances, furniture. Paiton in particular is credited in multiple sources for finding creative solutions through these channels.
- Habitat for Humanity ReStores: building materials at dramatically below-retail pricing; proceeds benefit Habitat for Humanity.
- Construction site surplus: contractors frequently have leftover lumber, insulation, tile, and roofing they'll give away or sell cheaply to avoid disposal costs.
- Community networks: in rural Washington, asking around among neighbors, farmers, and local builders yields unexpected material gifts from people mid-renovation.
10 design lessons from this build
-
1
Start with the land, not the container
Finding the right parcel — correct zoning, road access, utility hookup potential, and a site feature worth living on — is the most consequential decision in the project. The river bluff was the foundation of this build's success. That decision came before anything else.
-
2
Buy high cube, not standard
The one-foot height difference between a standard container (8'6") and a high cube (9'6") is the difference between a home and a box. After insulation, a high cube delivers 8'+ finished ceilings — a standard container delivers 7'–7'6", cramped and potentially below IRC minimums for habitable rooms. This is not negotiable for a livable conversion.
-
3
Orientation is your most powerful (and free) design decision
The bedroom-end doors opening to the Pend Oreille River cost nothing extra — it was a placement decision made before the container arrived. It became the home's single most dramatic feature. Once a container is set on its foundation, repositioning is a crane job. Get it right before delivery day.
-
4
The deck doubles your living space
The wraparound deck (~360 sq ft) nearly doubles the usable footprint in good weather — taking a 308 sq ft interior and creating 668 sq ft of total living space. Decking is DIY-accessible and relatively cheap per square foot compared to finished interior space.
-
5
Tongue-and-groove transforms a container into a cabin
No other single interior finish decision creates as much warmth and character. The wood paneling smells of fresh-cut lumber, reflects light softly, hides fasteners cleanly, and gives the space a natural quality that no paint color or drywall texture can replicate. It can be sourced from salvage or purchased affordably at any lumber yard.
-
6
Every piece of furniture must serve at least two functions
In under 400 sq ft, nothing can be decorative only. The island is dining table, desk, laundry station, and appliance housing. The sofa is guest bed. The barn door is space recovery. Multi-function is not a nice-to-have — it is the organizing principle of small-space design.
-
7
The barn door is one of the best investments in a small space
A sliding barn door costs roughly the same as a hinged door but recovers 6–8 sq ft of floor space lost to the door swing arc. In a 308 sq ft home, that's nearly 3% of total interior area. For the bathroom separation especially, this is a meaningful quality-of-life improvement at no extra cost.
-
8
The MDF/epoxy shower is underrated
Standard shower tile is expensive, time-consuming to install, and requires a tile setter's skill to do correctly. MDF panels coated in epoxy produce a waterproof surface with a marble-like aesthetic for a fraction of the cost — and the installation is within DIY reach. This single technique separates the bathroom on this build from what you'd expect at a $20K price point.
-
9
Salvage first — always
There is no path to a $20,000 finished container home without a systematic commitment to reclaimed, salvaged, and repurposed materials. This requires more time and creativity than buying retail, but the savings are decisive. Begin sourcing materials months before you need them — the best salvage finds require patience.
-
10
Plan for the Airbnb exit from the beginning
Matt and Paiton stated explicitly that when they move to a larger house, the container will be offered as a short-term rental. A waterfront container home with this level of design finish and a wraparound river deck is a compelling Airbnb listing. Building with that end use in mind — durable finishes, good Wi-Fi infrastructure, photogenic design features — adds no cost during the build and creates a real revenue stream later.
Container home vs. alternatives: the real numbers
| Option | Upfront cost | Monthly cost | Equity built? | Notes |
|---|---|---|---|---|
| Matt & Paiton's container home | ~$20,000 + land loan | Land loan payment (less than local rent) | Yes — land + structure | Own outright; Airbnb revenue potential |
| Conventional stick-built home | $250,000–$450,000+ | $1,800–$3,500 mortgage + taxes + insurance | Yes | 95%+ more expensive upfront |
| Apartment rental (same area) | $0 (deposit only) | $1,200–$1,800/mo | No | $300–$400/mo more than their land payment |
| Prefab tiny home (200–400 sq ft) | $40,000–$120,000 | Land + loan payment | Yes (structure depreciates) | Faster build; less customization; no salvage savings |
| Van / skoolie conversion | $15,000–$40,000 | Fuel + campsite fees or land | Depreciates as vehicle | Their previous life; less stable, more mobile |
"The project was a way to get into our own place while we save to build a family-sized house. Once we move out of this container it will be offered on a night-to-night basis on Airbnb."
— Matt, as reported by Tiny House Expedition
Could you replicate this build? An honest assessment
Matt and Paiton's build is inspiring precisely because it's genuinely replicable — not a TV-show fantasy. They were 23, had no construction experience, and did it while working regular jobs. But "replicable" doesn't mean "easy."
What you actually need:
- Land with appropriate zoning for an alternative dwelling — research this first, before purchasing anything
- 8–12 months of patience, especially for salvage sourcing
- Basic tool competence — circular saw, drill, grinder — and willingness to learn on YouTube
- A licensed electrician for the panel and service connection (most jurisdictions require this regardless of owner-builder status)
- A licensed plumber for the rough-in, or significant plumbing experience
- Access to a good salvage ecosystem — metro areas and rural renovation communities both work
What you can DIY vs. should license out:
- DIY-accessible: foundation prep, container interior framing, tongue-and-groove installation, deck construction, painting, cabinet installation, finish carpentry
- Requires skill or licensing: electrical panel and service, plumbing rough-in, spray foam insulation (equipment-intensive), structural steel cutting and frame welding
Verify permitting before you buy anything
Shipping container home permitting varies dramatically by county and municipality. Some rural counties have minimal requirements for owner-built structures; others require full building permits and inspections equivalent to conventional construction. Washington State has a patchwork of county-level rules — Matt and Paiton's rural northern Washington location likely had more flexible requirements than a suburban jurisdiction would.
Do not buy land or a container before verifying that your intended build is permitted in your specific county and zoning district. Contact your county planning department first and ask specifically: "Can I place and inhabit a converted shipping container on this parcel? What permits are required?"
See our full container home legality guide for state-by-state guidance.
Watch the original tour
The Tiny House Expedition video documents the full interior and exterior tour with Matt and Paiton on site. It's the primary source for this case study and worth watching for the design details that photographs miss — particularly the tin tile island, the moon phase mirrors, and the bedroom door opening to the river.
Sources for this case study:
- Tiny House Expedition — original video tour and written profile (2020)
- Matt and Paiton — @mattandpaiton Instagram and YouTube channel
- Autoevolution.com — full interior and exterior documentation (2023)
- Tiny House Blog — build profile and cost confirmation (2020)
- The Cooldown — follow-up coverage (2025)
- Cost data: confirmed $20,000 all-in; $4,500 container cost; 308 sq ft; 45-ft high cube
Ready to find your container?
Shipped.com supplies new and used containers across the US, with delivery included. High cube containers available in 40-foot and 45-foot sizes.
Get container quotes →